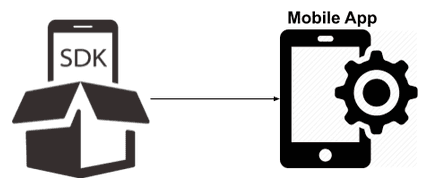
SDK Integrations
Introduction
NearX supports a number of out-of-box server-side integrations with popular CRMs, Marketing Management products and Location Management tools.
Android SDK/ARR Integration
Note: Please generate APIKEY by logging into our console
SDK
Steps to integrate NearX SDK into your Android app
-
Open your app in Android Studio
-
Open build.gradle of Project and add this code
allprojects { repositories { maven { url "https://jitpack.io" } } -
Open build.gradle of Module:app and add the below code
dependencies{ implementation 'com.github.nearxgetwalk:nearx:1.0' } -
Ensure your app is asking for below mentioned permissions in AndroidManifest.xml
<uses-permission android:name="android.permission.INTERNET" /> <uses-permission android:name="android.permission.ACCESS_COARSE_LOCATION" /> <uses-permission android:name="android.permission.ACCESS_NETWORK_STATE" /> <uses-permission android:name="android.permission.ACCESS_FINE_LOCATION"/> -
Now in your app’s AndroidManifest.xml, add the following lines
<receiver android:name="in.walkin.nearxsdk.geofence.GeofenceEventBroadcastReceiver" android:enabled="true" android:exported="true"> </receiver> <service android:name="in.walkin.nearxsdk.geofence.GeofenceTransitionsJobIntentService" android:exported="true" android:permission="android.permission.BIND_JOB_SERVICE"/> -
Ask for
Location Permissionin the runtime. -
Initialize the SDK with method methods.
    /* For Initialization */
    NearX nearx = new NearX(activity:this);

    /* Invoke below method for better detection in any of the below mobiles which would ask for auto-start permission */
    /* Xiomi, Oppo, Vivo, Letv, Honor, Huawei, Asus */
    nearx.checkHandset();

    /* Save user details by invoking below method */
    String mobileNumber = "987654321"
    String name = "UserName"
    String authKey = "<AUTH_KEY_GENERATED_FROM_WEBSITE>"
    nearx.saveUser(mobileNumber,name,authKey);

    /* You can fetch the saved user details seperately using below methods */
    nearx.getPhoneNumber();
    nearx.getUserName();
    nearx.getAuthKey();

    /* Additional features */
    // Test GPS Status
    nearx.testGpsStatus();

    //Re-register without changing user details
    nearx.reRegister(authKey,activity:this);
ARR
Steps to integrate NearX ARR into your Android app
-
Download the ARR file here
-
Goto File -> New -> New Module -> Import .JAR/.AAR Package.
-
Locate your path of AAR file and add Project Name. Example: nearxsdk-release. Click Next.
-
Open build.gradle of Module:app and add the below code
dependencies{ implementation project(path: ':nearxsdk-release') } -
Ensure your app is asking for below mentioned permissions in AndroidManifest.xml
<uses-permission android:name="android.permission.INTERNET" /> <uses-permission android:name="android.permission.ACCESS_COARSE_LOCATION" /> <uses-permission android:name="android.permission.ACCESS_NETWORK_STATE" /> <uses-permission android:name="android.permission.ACCESS_FINE_LOCATION"/> -
Now in your app’s AndroidManifest.xml, add the following lines
<receiver android:name="in.walkin.nearxsdk.geofence.GeofenceEventBroadcastReceiver" android:enabled="true" android:exported="true"> </receiver> <service android:name="in.walkin.nearxsdk.geofence.GeofenceTransitionsJobIntentService" android:exported="true" android:permission="android.permission.BIND_JOB_SERVICE"/> -
Ask for
Location Permissionin the runtime. -
Initialize the SDK with method methods.
    /* For Initialization */
    NearX nearx = new NearX(activity:this);

    /* Invoke below method for better detection in any of the below mobiles which would ask for auto-start permission */
    /* Xiomi, Oppo, Vivo, Letv, Honor, Huawei, Asus */
    nearx.checkHandset();

    /* Save user details by invoking below method */
    String mobileNumber = "987654321"
    String name = "UserName"
    String authKey = "<AUTH_KEY_GENERATED_FROM_WEBSITE>"
    nearx.saveUser(mobileNumber,name,authKey);

    /* You can fetch the saved user details seperately using below methods */
    nearx.getPhoneNumber();
    nearx.getUserName();
    nearx.getAuthKey();

    /* Additional features */
    // Test GPS Status
    nearx.testGpsStatus();

    //Re-register without changing user details
    nearx.reRegister(authKey,activity:this);
iOS SDK Integration
Note: Enable AppDelegate to start listening to location events
Steps to integrate NearX SDK into your iOS app
-
Integrate the Cocoapod here
-
Open
AppDelegate.swiftand add interfaceCLLocationManagerDelegateto start listening to location events. -
In the
didFinishLaunchingWithOptionsfunction, you need to add the following codelocationManager.delegate = self locationManager.requestAlwaysAuthorization() -
Override methods of locationManager that listens to geofence events
func locationManager(_ manager: CLLocationManager, didEnterRegion region: CLRegion) { GeofenceUtils.sendGeofenceEvent( eventType: GeofenceUtils.GEOFENCE_ENTRY, locationName: "\(region.identifier)" ) } func locationManager(_ manager: CLLocationManager, didExitRegion region: CLRegion) { GeofenceUtils.sendGeofenceEvent( eventType: GeofenceUtils.GEOFENCE_EXIT, locationName: "\(region.identifier)" ) } -
Go to
Info.plistand set values forNSLocationAlwaysAndWhenInUseUsageDescriptionandNSLocationWhenInUseUsageDescription. -
Initialize NearX SDK and send it relevant information
-
Whenever you want to start NearX (typically after user reqistration), you can add the following code in your
ViewController//Username of the user (optional) GeofenceUtils.setName(name: username) //Mobile Number of the user (compulsory) GeofenceUtils.setMobileNumber(mobileNumber: mobile) //Fcmtoken of the user (optional) GeofenceUtils.setFCMToken(fcmToken: token) //AuthKey for your project (This can be created in NearX Console) GeofenceUtils.setAuthKey(authKey:authKey) -
Initialize Geofences
    let geofence = Geofence()
    geofence.initializeGeofences()
Support
Have questions after reading the documentation? Contact us here
